
PrincessCrafts.com Web Scraps Tutorial
|
|
PrincessCrafts.com Computer Scrapbook pages make wonderful web pages. It's easy, fun and makes your personal web site look like no one else's. This is a very short tutorial, but will open your eyes to a whole new world of computer scrapbooking. But, before we get started... I just want to tell you that you don't have to be a web or computer genius to use our pages for the web. If you can crop photo's and use a basic word processor, we can show you how you can put your scrapbook pages on the web. If even that sounds like too much, when you get to the end, we'll tell you how we can help make it even easier. Read and see the special bonus at the end. At the beginning... |
|
Step 1: Choose your pictures
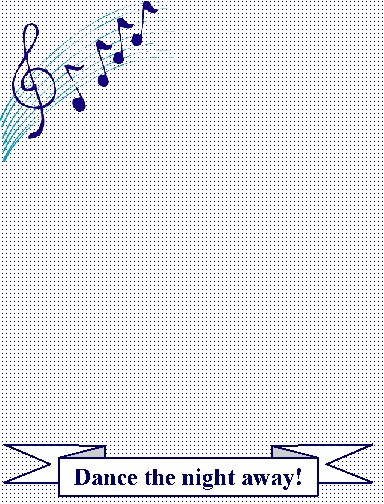
Collect the photos that you wish to show on the internet. If they're already digital, you're ready to go. If not, then you will need to scan them in or have someone do it for you. Just remember that these are for viewing on the web and not for printing, so small file size means faster loading. We recommend that you not use anything larger than 300x400 pixels or 4x5 inches. This will keep your pictures at a very viewable size without making the files so large that they take forever to load with a dial-up modem. JPG or GIF format will work better than BMPs as they are compressed and make even smaller files. You do drop some quality this way, but that's not very noticeable on a computer monitor. Step 2: Pick the page you want to make into a webpage. We searched through the extensive PrincessCrafts.com library of pages and picked one that we thought would go with the photo's we wanted to place on the internet. We chose this New Years page (at the right) since the photo's were taken around that time last year. With the selection available, we could have done just about anything... |
 |

|
Step 3: Crop the parts Open the GIF file for your chosen page and crop out the Header (the top graphical portion of the page), Background (the background pattern) and Footer (the bottom graphic), saving each one as it's own file. Why did we not use the whole page? SPEED! Quite simply, by doing this, we make smaller graphic files and make it faster for the page to load. Also, since any image used as a background in a web page gets repeated over and over again until the page is filled (no matter how long or short it is), we only needed enough of the page background to form a pattern through the page. The other two parts, the header and footer, will be used to top the page and close the bottom. |
Just remember that any program that you use to crop digital photo's on will work for this. The original page after all is a digital photo too.
Warning: Be sure and save the pieces as a new file name or you will loose the original. Use "File Save As..." when you save the three separate pieces.
Don't worry if you don't fully understand it all now, we'll show you more in later steps that should clear it all up. So, let's continue.
We happen to use Microsoft FrontPage to create most of our web pages, but any "What You See Is What You Get" (WYSIWYG) web program will work as long as it will form imbedded tables. Don't know what that is? No problem, we'll explain it more as we go. And, if you don't have a WYSIWYG program, we'll give you a template that you can edit in a text editor like NotePad at the end of the tutorial. So, don't fret the small stuff yet. We'll get you through it, don't worry.
Now, visualize how you want the page to look (or actually print the original page and place the photo's on it). The page we chose has a graphic in the upper left corner, an empty pattern down the page and a banner at the bottom. This left us with lots of possibilities. We chose to fill the upper right (next to the graphic) with a framed photo and caption, then zig-zag the photo's and text down the page (could have been as many photo's as we wanted) and of course finish with the footer graphic. Very simple and very easy to create and view on the web! You can do things as simply or as complex as you wish. It's your page. The purpose here is to teach the technique and let your creativity apply it to your pages.
| Step 5: Create
the Web Page Scrapbook
If you are creating the page from scratch, here's a couple of things to consider. First of all, the header, footer and background you created in the beginning are of finite or set sizes. When you set up the page properties, specify a set size for the page that matches the graphics. For instance, our footer properties showed it to be 758 pixels wide. So, our page is set to a max size of 758 pixels. You must remember that while the background is repeated to fill in whatever size you choose, the header and footer have limits to how much page they can cover before becoming blocky or unclear. |
 |
Don't use the percentage function. This allows your page to adjust to the different screen sizes of those that view your page. Everything might look great at 1024x768, but bigger or smaller may totally distort your layout and graphics. Since this is a scrapbook page, layout is everything! Specify the page size in pixels and you'll always know what it looks like. We recommend between 600 and 768 pixels in page width. That gives us two advantages. One, it's viewable in even small screen resolutions and two, when printed, it fits on a single standard 8 1/2" page width.
The last thing to do on the page itself is to identify the background image. As Ronco says, "just set it and forget it." You should now have a page filled with only the background image. Again, if you don't know where to set this, there's no problem. While we can't cover all the programs out there, we can show you where in the HTML code (same on every page) to specify the information. Even if you are using a text editor. Just see our instructions text link at the end.
|
|
Step 6: Insert
the tables, art and text
Tables are a must if you want your text to fill in beside each photo or artwork. Other wise, any text more than the width left will wrap around underneath the graphic. To make it work, first insert a table that spans the entire width of the page and a new row for each graphic or photo you will be talking about. A couple of extras don't hurt as you may want to have lots of text spanning the entire page width in some places. You can always remove the extras when you are done or leave them invisible at the bottom. |

Now, in each row that will contain a graphic or photo... insert another table that has 1 row and two columns (this is an imbedded table, one inside another). Why not make the whole page one table with two columns? Simple, if you do that, you will not be able to resize the columns on each line (row) to fit the photo and leave the rest for text or ??.
| Now it's just a matter of
moving down the page and inserting your text and photo's into the
table rows and columns. As an added bonus to our page, we
cropped and added some of our matching frames to the photo's.
We then just saved the finished framed photo's as another GIF image
and used them on the page.
As we went down the page, we sized each column to fit the image and filled the corresponding side with a large text to journal the image. This whole project took less than an hour from start to finish. It could have taken a lot less time if I had the page parts broken up before hand. |
 |
Last but not least, you will insert the footer graphic into the last full size, single column row at the bottom. This will make a nice closing to the page and finish it with a nice professional scrapped look. Now all you have to do is upload the page to your site and let everyone know it's there.
The Easy Way: Now, before we get to the finished page, I'd like to talk to those of you that don't have or have never used a WYSIWYG web page program. Not that they're hard or really complicated, it's just that I know of a few people in my own life that don't have the time or the inclination to learn and use a new software tool. So it's for those that the next couple of paragraphs are for.
So, what is the easiest way? Ready made templates that you just add your own pictures to, upload to your site (get instructions for that from your internet provider) and you're done. What am I talking about? In this case, we (PrincessCrafts.com) are going to give you a text file (usable in any webpage program or text editor), that's the template, along with the graphics for the Header, Background and the footer; so you can create your own great looking web scrapbook page.
Just download the Zip file link below and Unzip it to your hard drive. The instructions for use are inside the "Readme.txt" file inside the zip. We even identify what all the files are in the template and their sizes so you can create your own custom versions if you wish. As always, you're in charge with our help.
Here's the Zip file: PrincessCraft Web
The Finished Page: That's all everyone. The page is done and everything you need to make your own page that looks just like ours is in the file above. Want to see what the final page looks like? Check it out HERE!
Until next time, happy scrappin' everyone!
Kathy
