|
|
|||
| Members Home Page | |||
|
|
PNG files: To add your photos to our frames without all the cropping is very easy. You must have a desktop publishing program or scrapbook program which accepts .gifs or our newest hi-resolution .png format. Note: Sign-up for our FREE Computer Scrapbooking 101 mini-course and we'll give you a link to a FREE Software Suite - $80 to $200 value! Sign-up HERE. Start a new blank page (I'm using PowerPoint) and set-up your page to desired size. Insert the scrap page .gif onto the blank workspace page. Stretch the .PNG to fit the entire page.
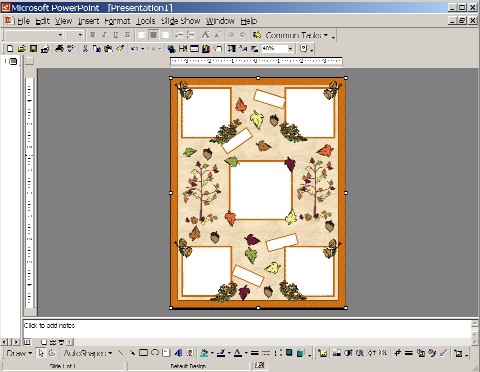
Choose the photos that you want in the frames and insert them over the top of your frame opening and center them where you want them. Make sure that they are approximately the correct frame opening size by shrinking, cropping or stretching them to fit. In the example below, you will notice that the photos are covering up part of the leaves and flowers that decorate the frame under them.
After all your pictures are where you want them just select the frame .png and choose Layer or Order from your program menus and choose bring to front. Voila! Just add journaling and you are done.
Now your
photos should be behind your frames page and only showing through the
openings. If your photos are
still not centered exactly where you want them, choose Layer or Order
from your menus again and choose send to back.
Move or adjust the photos and bring your frame page back to front
once more. Print and if
needed, cut out your finished frames with pictures inserted and paste them
on cardstock or scrapbook paper. If
your software allows layers, you may be able to just select the layer you
placed your photos on and adjust them at will. Just be sure and not
make our frames the background layer or you will not be able to place
anything behind it. Some of our sets include whole page frames in .png format also. Open your blank page and insert the whole page frame. Select a photo and insert it over the opening of the page frame with a small amount past the frame opening. Again, you may need to crop, shrink or enlarge your photo to cover the entire frame opening. After your picture is centered where you want it to show, select the photo and choose Layer or Order from your menu and choose send to back. That's it, you're done! Let us know if you have any questions or comments on our BLOG or in your Members Area Help Desk for those that have Signed up for the FREE Computer Scrapbooking 101 Course.
|
||
|
Privacy Policy SPAM Policy Disclaimer Contact Us Return Policy |
|||
|
|||
|
|
|
|
|